


Search Engine Optimization (SEO) is one of the key pillars for creating a successful website. You could build the best site ever, but without the right SEO practices, your site may as well be invisible. Luckily, Webflow makes adding all of the right SEO measures far easier than with other web development tools. In fact, as you build your website, you are likely to find that a lot of the top SEO measures are integrated into the interface to help users better navigate your website. That is to say that user experience (UX) and SEO go hand in hand when you are building a website. As a top Webflow agency, Responsival has seen the benefits of Webflow for SEO for our clients. That’s why we’re sharing some of our top strategies to get the most out of your website’s SEO using Webflow. Are you ready to optimize your site? Let’s get started!
Webflow Makes Optimizing For SEO Easier Than Ever!
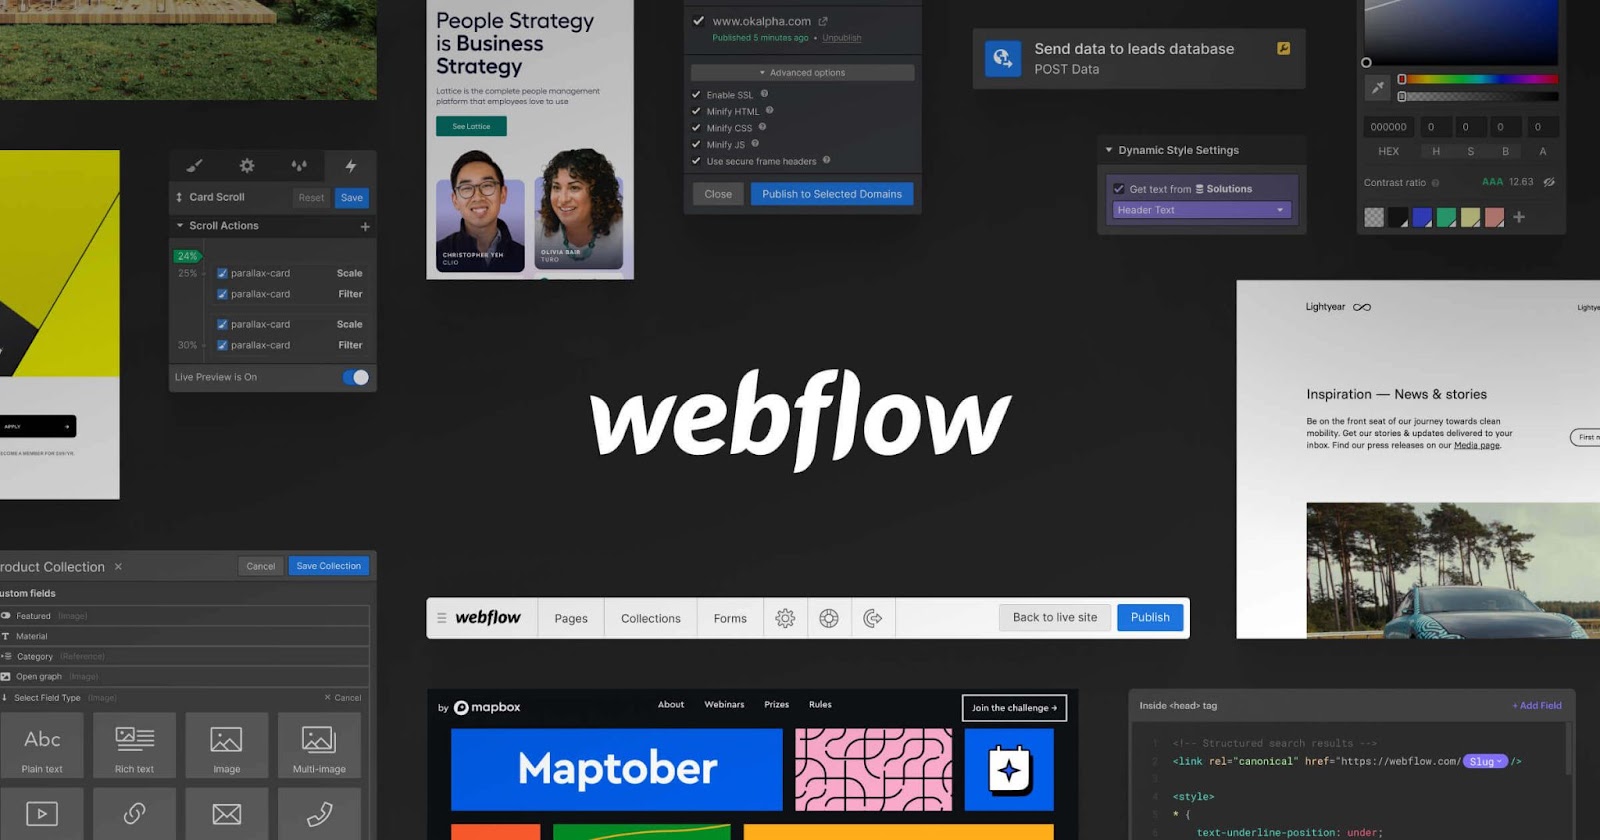
Avoid any complex backend coding by using Webflow to design your next website
If you have previously struggled with SEO using other website builders like WordPress, then just the mention of SEO may seem intimidating. With Webflow, however, this is not the case. As you build your website, you’ll find that there are optimization options available for adding titles and meta descriptions to your site, adding alt text, editing URLs, ways to improve your overall user experience, and more! In the next section of this article, we’re going to be going over the different ways you can use Webflow to optimize your website and how the interface allows for simple SEO tweaks that can be made by anyone on your team—not just your designers.
1. Title Tags & Meta Descriptions
Optimizing your title tags can give your site a big boost on the search engine results page

When your site appears on the search engine results page, the first thing an internet user will see is your title tag and meta description. The title tag and meta description show a snapshot of the content on your website. From there, the user will decide whether or not your site’s title tag and meta description fit their search query before proceeding to your website. If you do not have a title tag and meta description, if they are too long and are being truncated, or if they are unclear, your SERP rankings will suffer. The higher the SERP ranking, the more organic traffic you will get on your site.
When it comes to using Webflow to input your title tags and meta descriptions, the process is pretty easy. In just these few steps, you can start achieving better page rankings and driving more traffic to your site.
To access settings for titles and metas on your Webflow site audit, start by navigating to the pages settings. The icon to access settings looks like a cog. Once you are in the settings, navigate to the SEO settings. After that, all you have to do is type in your title tag and meta description, save, and publish!
Adding title tags and meta descriptions to “Collection” pages in Webflow is a breeze as well. By navigating to the SEO setting the same way we previously described—look for the cog button in your collections—you can get started! Once you are in the SEO settings for your collections you need to click the “Add Field” option to the right of the title tag to add a dynamic field. Then, you repeat the process for your meta description. After that, you can type in your desired title tag and meta description, save your work, and publish your site. While we don’t have time to go over how to properly write the best possible title tags and meta descriptions here, you can read more about optimizing them on our blog.
2. Alt Text for All Relevant Images
Make sure that SERP crawlers understand your content while meeting the necessary accessibility requirements

Adding alt text to all of the relevant images on your website is another important step that you should take to help optimize your site. Alt text is important for a number of reasons—the first and most important reason for alt text is to describe images to the visually impaired. Because SERPS want all web pages to be ADA compliant, they reward sites that make efforts to be as accessible as possible. With alt text, a site visitor who needs your site read aloud to them can hear a description of the image for better comprehension. Additionally, alt text allows search engine crawlers to better understand your content. Since these crawlers do not see the composite images, they rely on alt text to describe the image for added context to your site's contents. In areas with limited internet access, alt text can be critical for understanding the contents of a web page. That’s why, if you do not currently have alt text on your site, you should start making additions as soon as possible.
There are a number of ways to add alt text in Webflow and it depends on where your image is located. If an image is on one of your static pages, simply clicking on the image in design mode will present the cog icon. By clicking on the cog icon, you can access the image settings. One of these settings will be options for alt text.
If you are working in collections, you can repeat the same process for images in your body paragraphs. However, for the images in the paragraph body, the setting icon looks like a wrench instead of a cog. The trickiest part is adding alt text to hero images in your collections. In order to do this, you need to add a field to your collection and label it “Alt Text.” Then, in your page template settings, stipulate that all hero images get their alt text from the new field you titled “Alt Text.” After you’ve set this rule, all of your hero image alt text will be taken from the new field you just created. Though this may sound like a lot of steps, the traffic you garner from your image searches will be well worth your time.
3. Optimize Your Site Architecture
When your site is well thought out and makes sense to users, people are more likely to visit, revisit, and convert
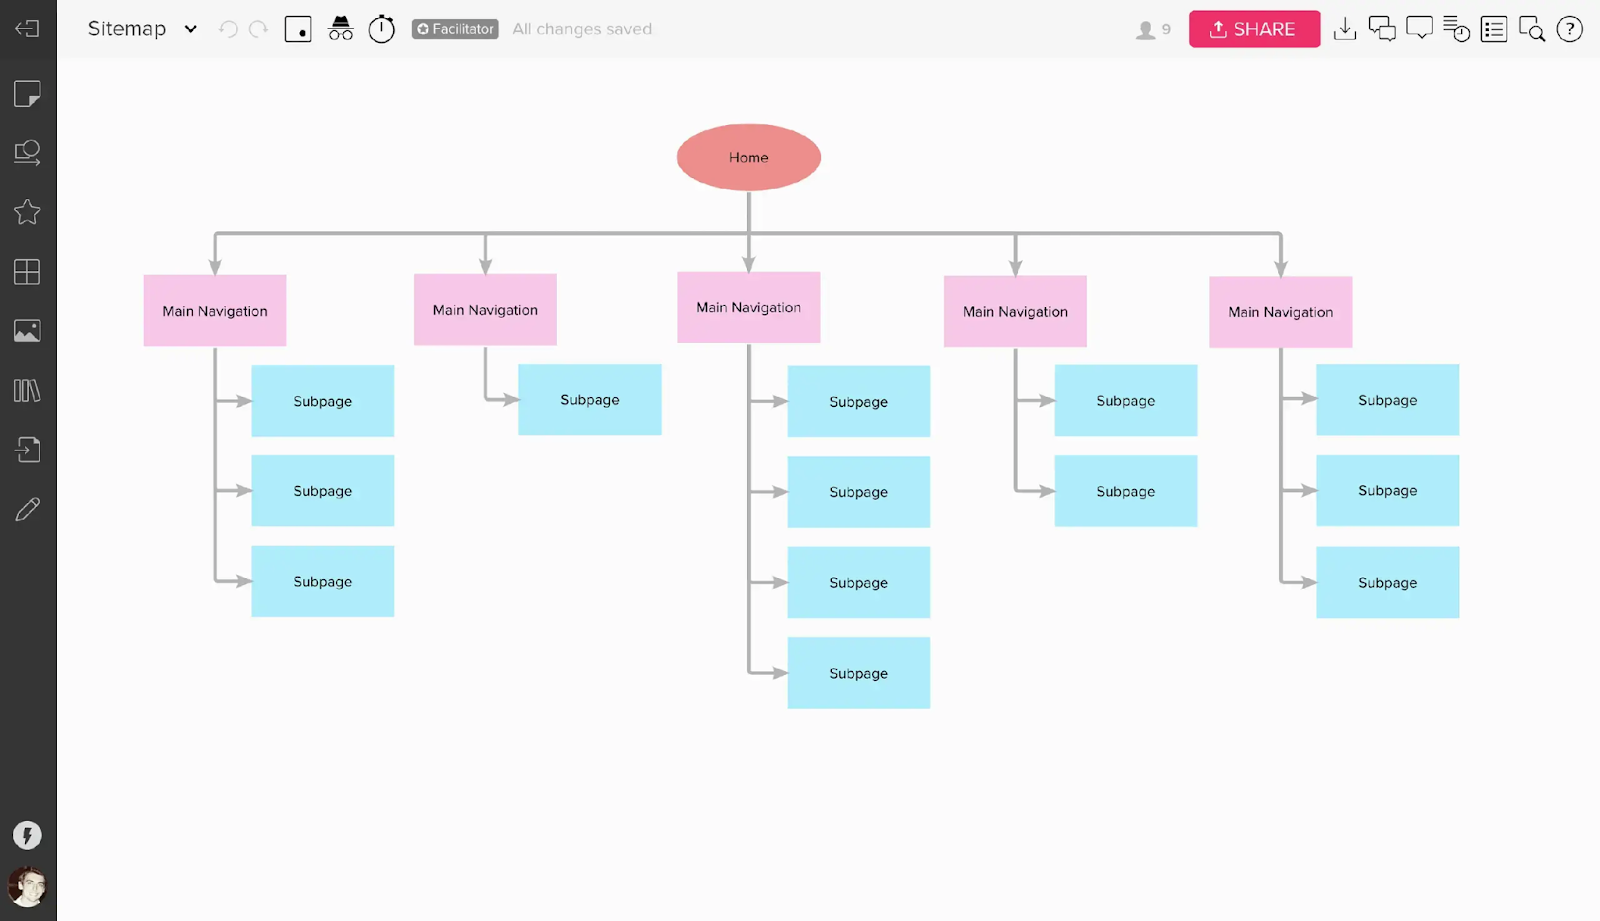
Your site architecture and how users interact with it are a major part of SEO. As we mentioned in the introduction, there are a lot of SEO practices that tie in with UX best practices. Your site architecture is the foundation of your site’s UX. When someone enters your site, it needs to be clear how visitors can navigate to the information they need. Think about your website as a museum. If there is no signage or unclear signage, people will get confused and have a hard time seeing everything in addition to finding necessities like restrooms or the exit. If your site architecture is convoluted and hard to navigate, it will create the same type of confusion.
That’s why you need to make sure that your site is easy to navigate, and does not have any dead-ends. To help you get started planning or reevaluating your site architecture, let’s go over some of the top things you need to consider to make sure your site is fully optimized:
- Make sure all pages have a clear pathway—this means no orphaned pages
- Group all relevant content together in a way that will make clear sense to users
- Prioritize intuitive navigation with clearly defined headers, footers, and content pages
- Make sure the most links direct toward your most important pages
By taking these points into consideration as you design—or redesign your website—you can make sure that your site architecture makes sense both to search engines and to your site visitors. It is also a great strategy to visually plan out your site map. That way, you can see every aspect of your site at once and how all of the pieces fit together. By paying attention to your site architecture, you can also ensure that the most important pages on your site are being prioritized by the algorithm. This means making the navigation to these pages easy and obvious. For example, it is beneficial to put your most important content in the header menu as opposed to the footer. That way, your most important pages appear at the top of your site and are immediately visible to the user.
Luckily, with Webflow you can easily organize your content into CMS collections. In just a few clicks you can create new collections to organize blogs, press releases, case studies, and more. When you use Webflow, you can easily view your site architecture via collections rather than getting lost in a mess of code.
4. Customize Your URL Structures
Use your URLs to include target keywords

Another extremely important—yet often overlooked—aspect of your site is the URL slugs. In a similar way that title tags and meta descriptions give users and search engines information about your site, URLs help convey the most important information on your site. Because of this, you want to customize your URLs using concise language and keywords. It is important to avoid overusing keywords in this instance as it can only lengthen your URL and may confuse the search engine crawlers. However, if you have a keyword that matches the contents of your site and it fits within a URL, it can help boost your page ranking. It is beneficial to make your URLs as short and as catchy as possible so that they are easy to share. The shorter the URL, the more quickly a search engine crawler can assess and rank your site.
In order to change the URL of a page in Webflow, all you have to do is locate the field that is labeled “slug.” Once you’re there, you can freely edit the URL for your page. This is also true for pages within collections as well. Once you navigate to the collection and specific page where the URL needs to be changed, you can once again locate the “slug” field and make your edits—just be sure to set up redirects if you change a previously published url!
5. Use the Right Headings on Each Site Page
Headings show both your reader and the search engines the most important content on your site
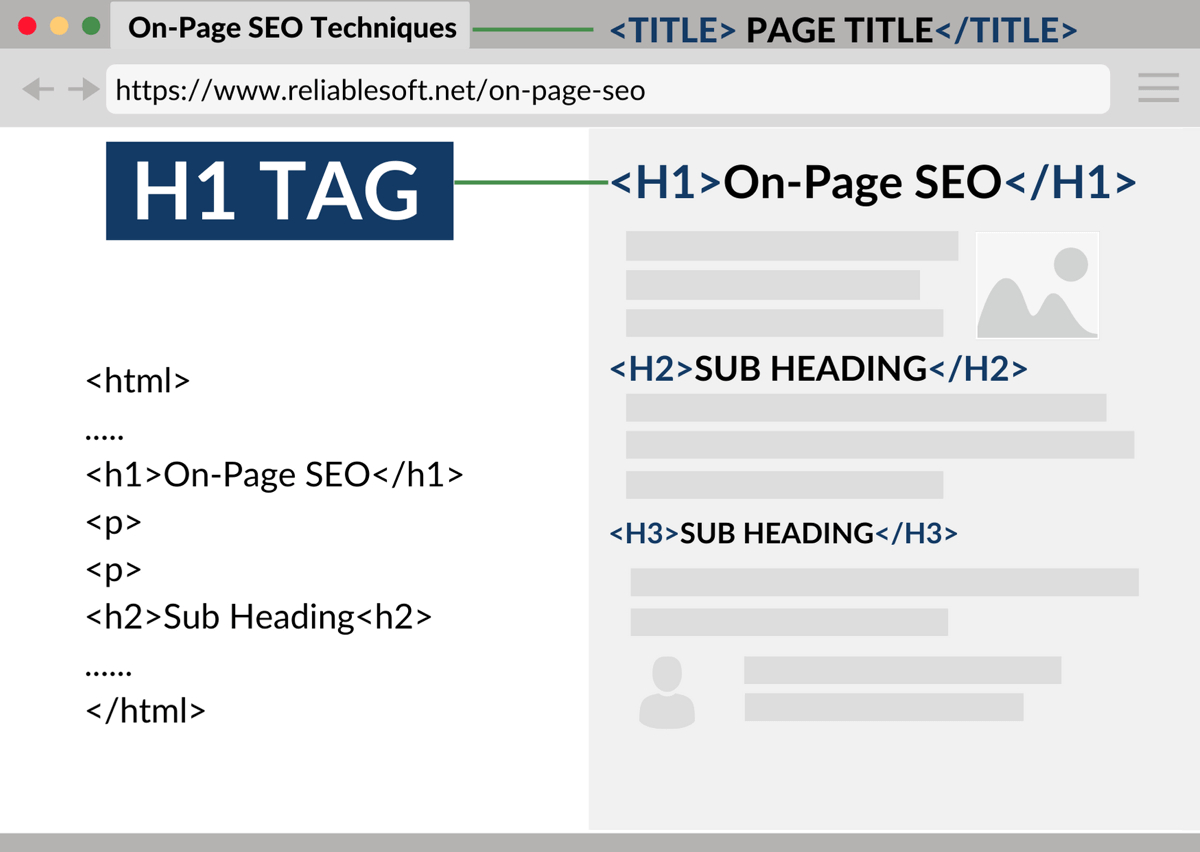
Now that we’ve taken care of your title tags, meta descriptions, images, site architecture, and URLs, it is time to move on to the content of your site. Using the right headers in the right places is helpful for your readers, but did you know that it also helps search engines index your site? Just like a lot of the other SEO aspects we’ve discussed today, this is another instance of UX and SEO working to achieve the same goals.
In the past, using keywords in the headings of site content was highly recommended. While it is still recommended to use keywords where they fit, it is important to avoid keyword stuffing in your headings. Though this technique worked in the past to increase page rankings, it is now more likely to hurt your page rankings if you are using your keywords too often.
To use the right headings for each section, you need to note the importance of different headings by using H1, H2, and H3. For these titles, you need to put your highest level information—usually a title—in H1, any subcategories in H2, and any further categorizations in H3. As the headings descend, the information provided should get more and more specific. It is in your best interest to proofread all of your site content to make sure you are not accidentally misusing your headings.
If you are looking for ways to boost your site’s SEO or are wondering why your site's metrics aren’t performing as you expected, then you can try out any of the strategies we’ve listed so far! Optimizing your site for SEO using Webflow is easier than you think! Using the intuitive controls provided by Webflow, you don’t have to mess with raw code as you are auditing your site. As a Webflow agency, Responsival has found Webflow’s functionality to be critical for managing our own site and for our client’s sites. If you feel like you need some help optimizing your site, don’t hesitate to reach out to the Responsival team! Our mission is to help our clients improve their online presence using the tools provided by Webflow.

.jpg)
